Monday, June 4, 2012
London ~ Paris ~ Amsterdam
This is the latest coffee table book I created. All the photos in this book were taken by me on my trips to Paris, London and Amsterdam over the past 2 years.

Thursday, May 31, 2012
Best Cheeseburger Ever!!!

I mean, you really can't go wrong with a good cheeseburger...and boy is this one fabulous!!! The mix of the tangy sauce, caramelized mushrooms and onions and melted cheese makes this burger one for the record books!
Between Jay and I, we have finally mastered what it takes to make a fabulous cheeseburger every time. First off, you must use 85% lean ground chuck. I know in most of my posts I am all about the 93% lean beef....but you CAN'T use this when making hamburgers! Trust me! Also, if your grocery store only has 80% lean, choose that over ground sirloin or round which will be less flavor. As a general rule 1.5 lbs of ground beef will make 4 patties.
Also, to season your burgers, you only need a bit of salt and pepper. This way you will enhance the beef without masking the flavor.
Lastly, don't overwork the ground beef. The more you handle and squeeze it, the more you risk losing it's juicy, tender texture. Make sure you handle it with care when mixing in any spices and forming it into patties. And, whatever you do, don't press on your burgers while they are on the grill ; you'll only press out the juices.
Now, remember these tips and follow the steps below, and you will be on your way to enjoying the best burger ever!!!
Burger Ingredients
- 1.5 lbs of ground beef (85% lean)
- 4 slices of Gruyere or Provolone Cheese
- 4 good quality hamburger buns, toasted
Directions
- Season the meat lightly with salt and pepper.
- Gently and briefly mix the seasoning into the meat - do not squeeze!
- Gently form the meat into generous patties that are between 1 and 1 1/4 inches thick (about 3.5 inches in diameter).
- Make a deep depression in the center of each patty using your thumb or a spoon to ensure they don't puff up in the middle while they cook.
- Grill over a medium-hot fire and cook for approximately 5-7 minutes per side.
Topping Ingredients
- 2-3 tbs extra-virgin olive oil (more as needed)
- 1/3 cup of mayonaise
- 1 tsp finley chopped rosemary
- 1 small garlic clove, minced
- 1 tbs Dijon mustard
- 1.5 tsp fresh lemon juice
- 1 large sweet onion, thinly sliced (about 2 cups)
- 1 package of pre-cleaned sliced mushrooms
- 12 fresh arugula leaves
Directions
- Combine the mayo, rosemary, garlic, Dijon mustard and lemon joice in a small bowl. Season to taste with salt and pepper and set aside.
- Saute the mushroom and onion in the olive oil over medium heat, stirring occasionally, until deeply golden brown and tender - about 15-20 minutes.
Once the burgers are done and all toppings have been prepared. Build your burger as you so desire....and voila.....the worlds best cheeseburger!!!
Until next time...
XOXO
Suzanne
Monday, May 7, 2012
J'adore Paris au printemps!
This spring I had the pleasure of heading to Paris again for a quick 3 day trip. I must say, it doesn't get much better than strolling through the streets of Paris with the sun beaming down, the flowers in bloom and the cafe's overflowing with locals and tourists alike. Also, seeing as how this is the place Jay proposed, Paris will always hold a special place in my heart!
For this trip, I decided that I didn't want to spend any time inside any of the fabulous museums throughout the city. Instead, I wanted to spend my time simply soaking in the Parisian lifestyle and enjoying all it has to offer. So...I ate alot, shopped alot and walked ALOT!
In my past trips, I always thought it was the funniest thing to see someone walking down the street eating a huge loaf of french bread. So, since I was trying to soak in the Parisian lifestyle, I had to get me some bread. (and of course some macaroons)
I stopped at the first bakery I saw and ordered the biggest loaf they had. I was set! I took off strolling down the Champs Elysee on my way to the Eiffel Tower. When I approached, I was so excited to see the tulips and cherry trees in bloom. Luckily, I finished my loaf of bread just in time to capture a few shots.
I stopped at the first bakery I saw and ordered the biggest loaf they had. I was set! I took off strolling down the Champs Elysee on my way to the Eiffel Tower. When I approached, I was so excited to see the tulips and cherry trees in bloom. Luckily, I finished my loaf of bread just in time to capture a few shots.


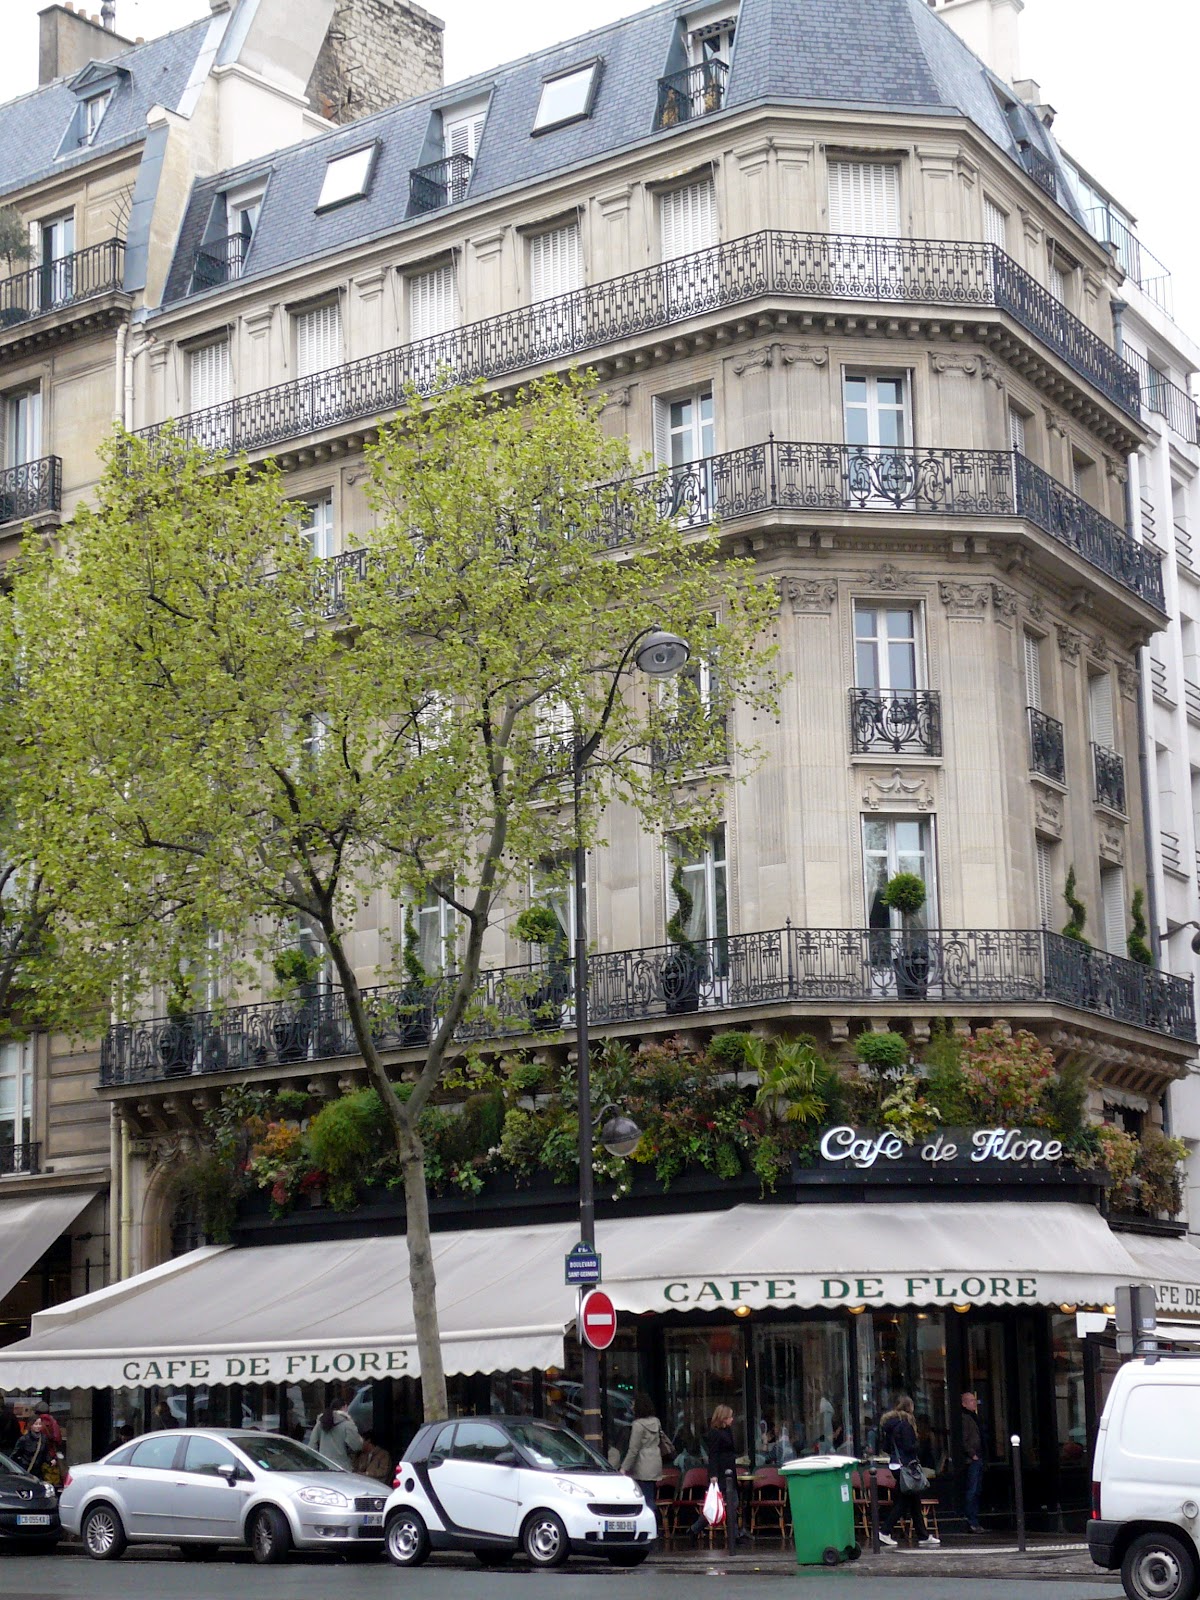
I then decided to head over to St. Germain for a bit of shopping. However, I ended up doing more window shopping then anything else. That US exchange rate gets me every time! After perusing past the stores on the Rue de Bac, one of my favorite little streets in the area, I decided to head over for a bite to eat at the ever popular Cafe de Flore. The classic Art Deco interior of all red seating, mahogany and mirrors has changed little since World War II. Like its neighboring cafe, Les Deux Magots, it has hosted a wide array of the French intellectuals.
After lunch I took a nice relaxing stroll along the Seine, stopping only to people watch and to grab a nutella crepe! (which are my absolute fave!!!) Below are a few of the shots I took as night fell over The City of Lights.
 |
| Louvre Museum |
 |
| Pont Alexandre III |
 |
| Musee D'Orsay |

Notre Dame
 |
| Musee D'Orsay |
 |
| gardens behind the Notre Dame |
 |
| bridge over the Seine connecting Ile de la Cite and Ile St-Louis (just behind the Notre Dame) |


My stay in Paris ended this evening with a stroll past the Eiffel Tower, just in time to see it light up in all its glory!


Until next time...
XOXO
XOXO
Suzanne
Thursday, May 3, 2012
Spaghetti w/ Chicken & Grape Tomatoes
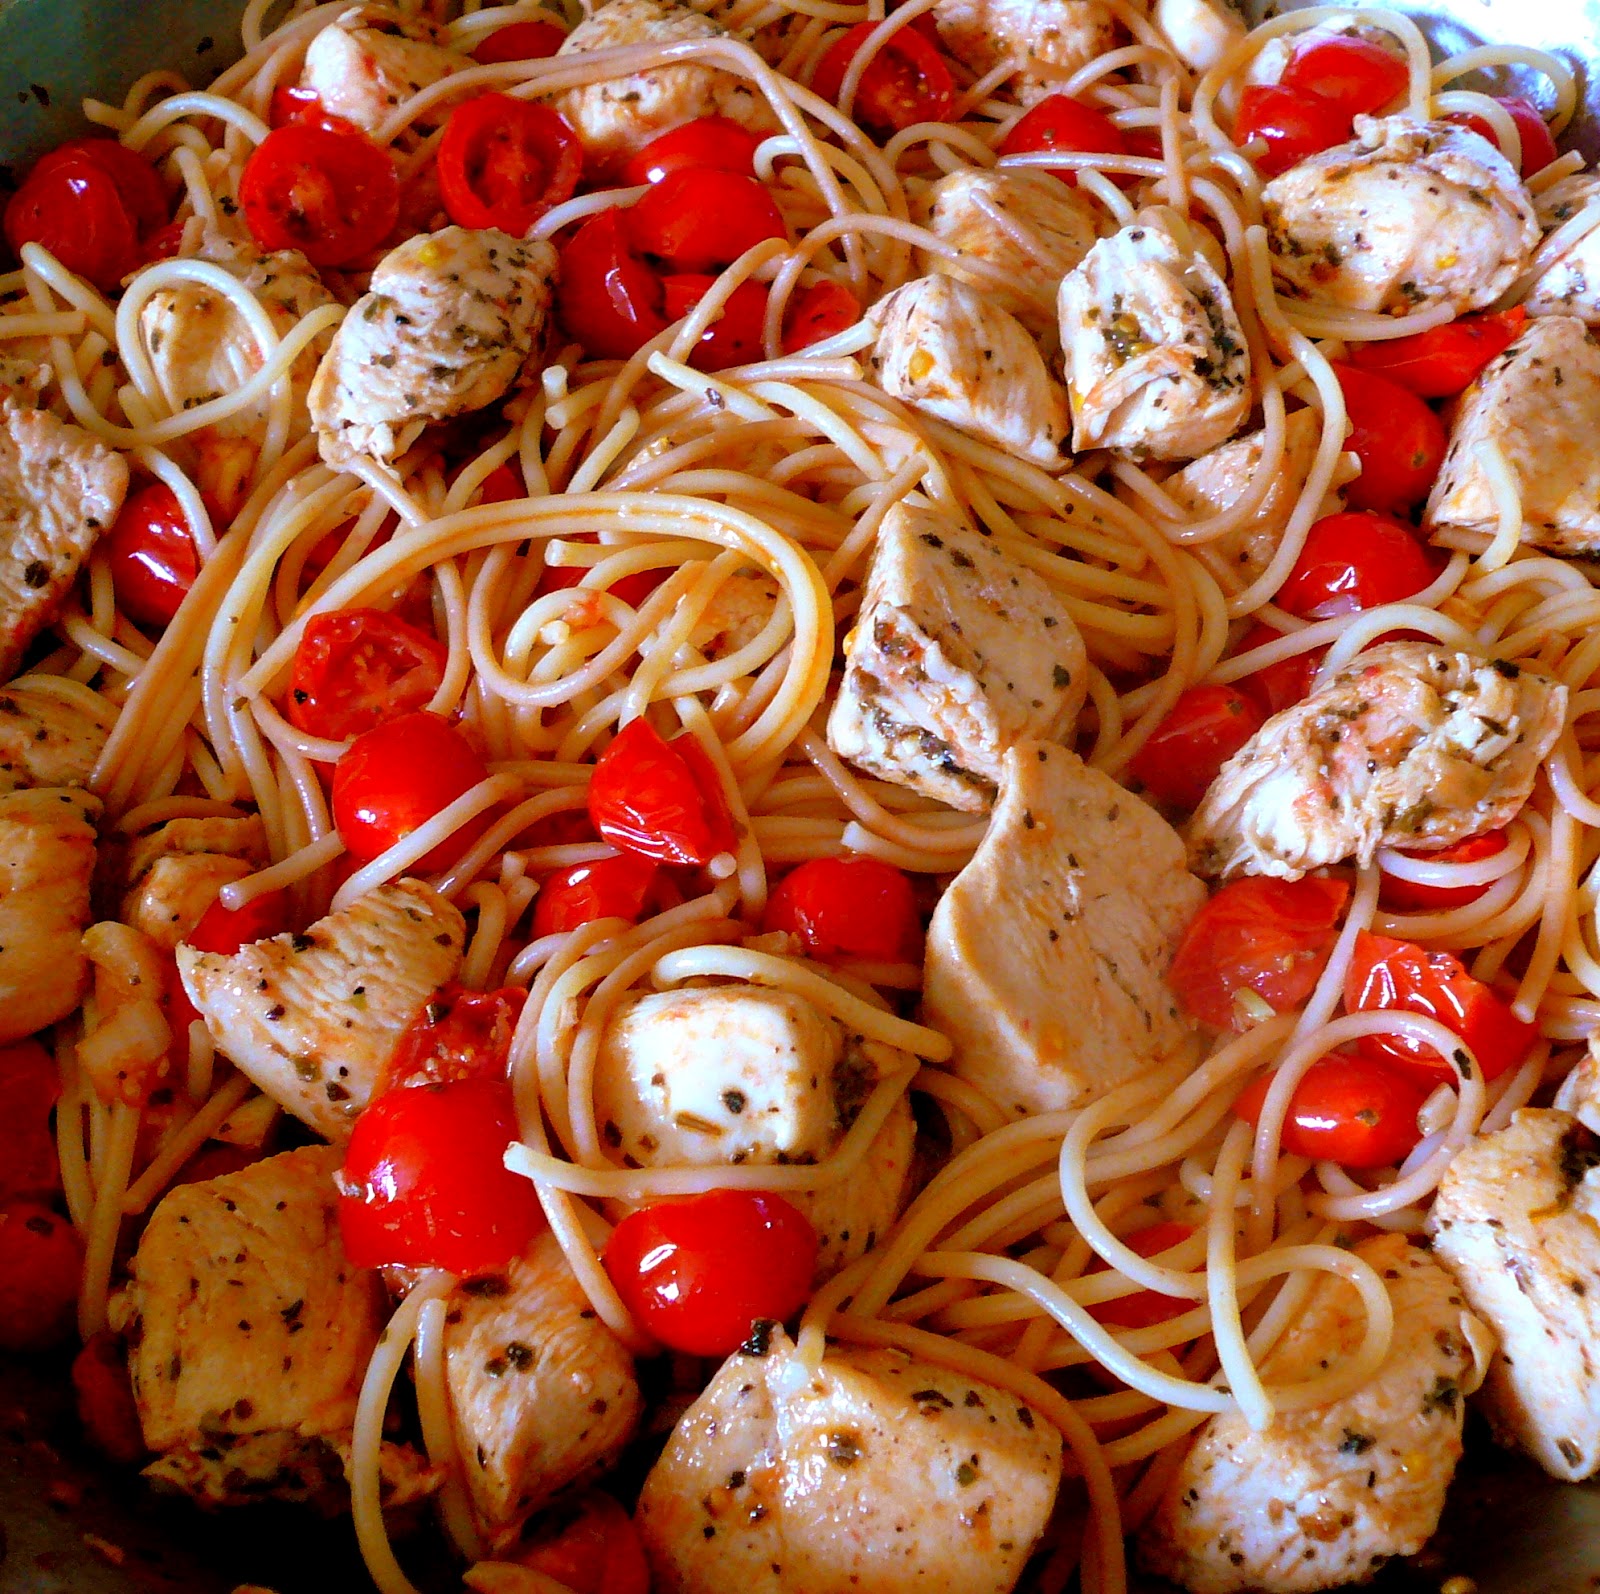
While on Pinterest I ran across this fabulous blog, skinnytaste.com. This is quickly become one of my "go-to" websites for healthy recipes. The recipe below was adapted from one of the recipes from that blog. It is healthy, light and flavorful - perfect for an easy summer time dinner. Serve it with a side salad and you're ready to go! And - if you want to add a pop of color to your dish, simply sprinkle some freshly chopped basil on top before serving.
Ingredients:
- 3 skinless chicken breast halves, diced into 1 inch cubes
- 1 tsp of dried basil
- 1/2 tsp of dried oregano
- salt and fresh cracked pepper
- 10 oz of whole wheat spaghetti
- 3 cups grape tomatoes, halved
- 6 cloves garlic, coarsely chopped
- 6 tsp extra virgin olive oil
- grated Parmesan to taste
Directions:
- Bring a large pot of salted water to boil and cook noodles as directed on the box.
- Season chicken generously with salt, pepper, oregano and basil.
- Heat 2 tablespoons of olive oil in a large skillet on med - high heat.
- Add chicken and cook about 4 minutes, until no longer pink.
- Remove chicken and set aside.
- Using the same skillet that you cooked the chicken in, add 4 tablespoons of olive oil and chopped garlic. Saute the garlic on med-high heat until golden brown.
- Add tomatoes with a bit of salt and pepper.
- Reduce heat to med - low and saute for about 5 minutes.
- Add drained pasta into the skillet with the tomatoes and toss well.
- Add chicken to skillet.
- Let simmer for a few minutes to let flavors meld together before serving.
- Top with a bit of grated Parmesan before serving.
Enjoy!!!
Until next time...
XOXO
Suzanne
Friday, April 13, 2012
Baked Zucchini Fries

I wanted to find a way to incorporate "french fries" into my diet without having all of the added calories that come along with them. I searched the web and found this recipe for "zucchini fries" on a blog entitled "Our Best Bites". I wasn't sure how impressed I would be with this recipe but it turned out to be fab! This recipe should yield about 4 servings depending on how big your zucchini are.
- 2 large zucchini
- 1/2 cup Italian seasoned panko bread crumbs
- 1/4 cup grated Parmesan cheese
- 2 eggs
- Line a baking sheet with aluminum foil and spray with non-stick cooking spray. Set aside.
- Combine bread crumbs and Parmesan cheese in bowl and set aside.
- Whisk 2 eggs together in a shallow bowl and set aside.
- Cut the zucchini into strips to create "fries".
- Spoon a small amount of the bread crumb mixture into a shallow bowl or pie pan. (You don't want to use the entire mixture at once because the bread crumbs will soak up the moisture of the eggs and won't stick to the zucchini.)
- Dip a few of the zucchini strips into the egg and shake to remove any excess.
- Roll them in a small amount of bread crumbs to coat.
- Place on the lined baking sheet.
- Repeat until all strips are coated.
- Bake for 20-25 minutes at 425. Flip the fries half way through. Coating should be crisp and golden brown. Serve immediately.
Stuffed Chicken Roll-Ups

Ingredients:
- 1 tsp olive oil
- 2 cloves garlic, chopped
- 2 packages of pre-cleaned sliced mushrooms, roughly chopped
- 1/2 large onion, chopped
- 1/4 cup grated Parmesan
- 3 oz part skim shredded mozzarella (approximate)
- pepper to taste
- 3 boneless chicken breasts
- 1/2 cup Italian seasoned panko breadcrumbs
- 1 lemon
- olive oil non-stick spray
To prep the chicken:
- Pound out each chicken breast to approximately 1/4 inch thick.
- Combine the juice and zest of one lemon with 1/4 cup of olive oil, 1 chopped garlic clove and 1 teaspoon of fresh cracked black pepper.
- Marinate the chicken breast in the mixture above for 30 minutes.
- In a large skillet, heat oil on medium-high heat. Saute the chopped onion, chopped mushrooms and chopped garlic.
- Set aside to cool.
- Combine 1/2 cup of panko breadcrumbs with 1/4 cup of grated parmesan cheese in a measuring cup.
- Spoon 1/3 of the mixture onto a plate. (You don't want to work with all the bread crumbs at once because the panko crumbs soak up the moisture very quickly and won't stick to the chicken!!!)
- Lightly spray a baking dish with some olive-oil cooking spray and place at the end of the assembly line.
- Lay one marinated chicken breast down on a working surface and sprinkle evenly with mozzarella cheese across the entire breast.
- Spoon 1/3 of the mushroom mixture onto the breast and spread evenly.
- Loosely roll up the stuffed chicken breast.
- Roll the chicken in 1/3 of the coating mixture and coat as evenly as possible.
- Place the rolled chicken seam side down into the baking dish.
Repeat with the 2 remaining chicken breasts.
Once all chicken is in the baking dish, lightly spray with olive oil spray and bake for 25-30 minutes on 450.
Side note - I put 2 or 3 toothpicks in each chicken breast to help hold it together when baking. However, I don't know if this was actually needed.
Until next time...
XOXO
Suzanne
Until next time...
XOXO
Suzanne
Thursday, April 5, 2012
Roasted Broccoli

I modified her recipe to include less ingredients, making it more budget friendly and easier for our simple week night dinners. This is a must try if you are tired of having the same old broccoli night after night! Who knows, you might even get your kids to actually eat their broccoli!
Ingredients
- 3 or 4 large heads of broccoli (about 8 cups of florets once they are cut from the stalks)
- 4 garlic cloves, peeled and thinly sliced
- 5 tbs olive oil
- freshly ground black pepper
- 1 tbs freshly squeezed lemon juice
- dash of lemon zest
- 1/3 cup freshly grated Parmesan cheese (optional)
- Directions
- Cut the broccoli florets from the thick stalks and pull apart the larger florets.
- Toss the broccoli florets with the 5 tablespoons of olive oil and sprinkle with pepper.
- Please the florets on a sheet pan in a single layer and sprinkle the sliced garlic all over.
- Cook in the oven for about 25 minutes on 425 - until the tips are slightly browned.
- Remove the broccoli and drizzle with 1 tablespoon of lemon juice and grade some lemon zest over the top.
- Top it all off with a bit of Parmesan cheese (optional)
Until next time...
XOXO
~Suzanne
Saturday, March 24, 2012
Charleston Cheese Dip

Ingredients
- 1/2 cup mayonnaise
- 8oz package cream cheese, softened
- 1 cup grated sharp cheddar cheese
- 1/2 cup grated Monterey jack cheese
- 2 green onions, finely chopped
- 1/4 tablespoon red pepper flakes (or more if you'd like a bit more kick)
- 8 Ritz crackers, crushed
- 8 bacon slices, cooked & crumbled
Directions
- Mix mayonnaise, cream cheese, cheddar cheese, Monterey jack cheese, green onions and red pepper flakes.
- Transfer the mixture to a shallow baking dish.
- Top mixture with cracker crumbs.
- Bake for 15 minutes at 350 or until heated through.
- Remove from the oven and top with the bacon.
- Serve immediately with crackers.
Until next time...
XOXO
~Suzanne
Thursday, March 22, 2012
Easy Stuffed Bell Peppers

I wanted to create a stuffed pepper recipe that would be "somewhat" healthy, yet still quite tasty and easy! For starters, I didn't want to use any canned sauces in my recipe, due to the increased sodium those tend to bring. So, to make this a "healthy" recipe, just make sure you use the 93% lean ground beef, low fat mozzarella cheese and brown rice. You could also do without the butter. However, I unfortunately have subscribed to the Paula Dean ways of the world - and everything is better with just a little bit of butter!
Ingredients
- 1 pound ground beef
- 1/2 cup uncooked white rice
- 1/2 cup mozzarella cheese (or more if you love cheese)
- 4 large bell peppers
- 2 medium tomatoes
- 1 large onion
- 2 garlic cloves
- salt and pepper to taste
- 1/4 tsp Oregano
- 1/4 tsp Basil
- 1-2 tbs olive oil
- 1/2 tbs butter
Directions
- Cook rice as directed on the package and set aside.
- Chop onion, tomatoes and garlic cloves.
- Slice the tops off of the bell peppers. Chop the edible part of the tops and set aside. Remove the pulp and seeds from the inside of the peppers.
- Bring a large pot of salted water to a boil, add the bell peppers and boil for 7 minutes. Remove the peppers from the water, and set aside.
- Heat olive oil and butter in a large skillet over medium heat until hot. Saute the chopped green pepper (from tops), chopped onion and chopped garlic for about 7 minutes, or until vegetables are starting to become tender.
- Add ground beef, oregano and basil and cook until browned.
- Add chopped tomatoes, cooked rice and salt and pepper to taste. Reduce heat and simmer for about 10 minutes.
- Stuff the mixture into the peppers. Place the peppers in a casserole dish so they are standing upright. Cover with foil and bake on 400 for approximately 30 minutes.
- Once the peppers are done, remove the foil, top each with shredded mozzarella cheese and bake until cheese is melted (approx. 5 min).
The photos below highlight the major steps.


Until next time...
XOXO
~Suzanne
Sunday, March 18, 2012
London Calling....
I just got back from my 5th trip to London in almost 4 years....and I must say....it never gets old! There is just something about throwing back a pint or two with the Brits that makes me happy!
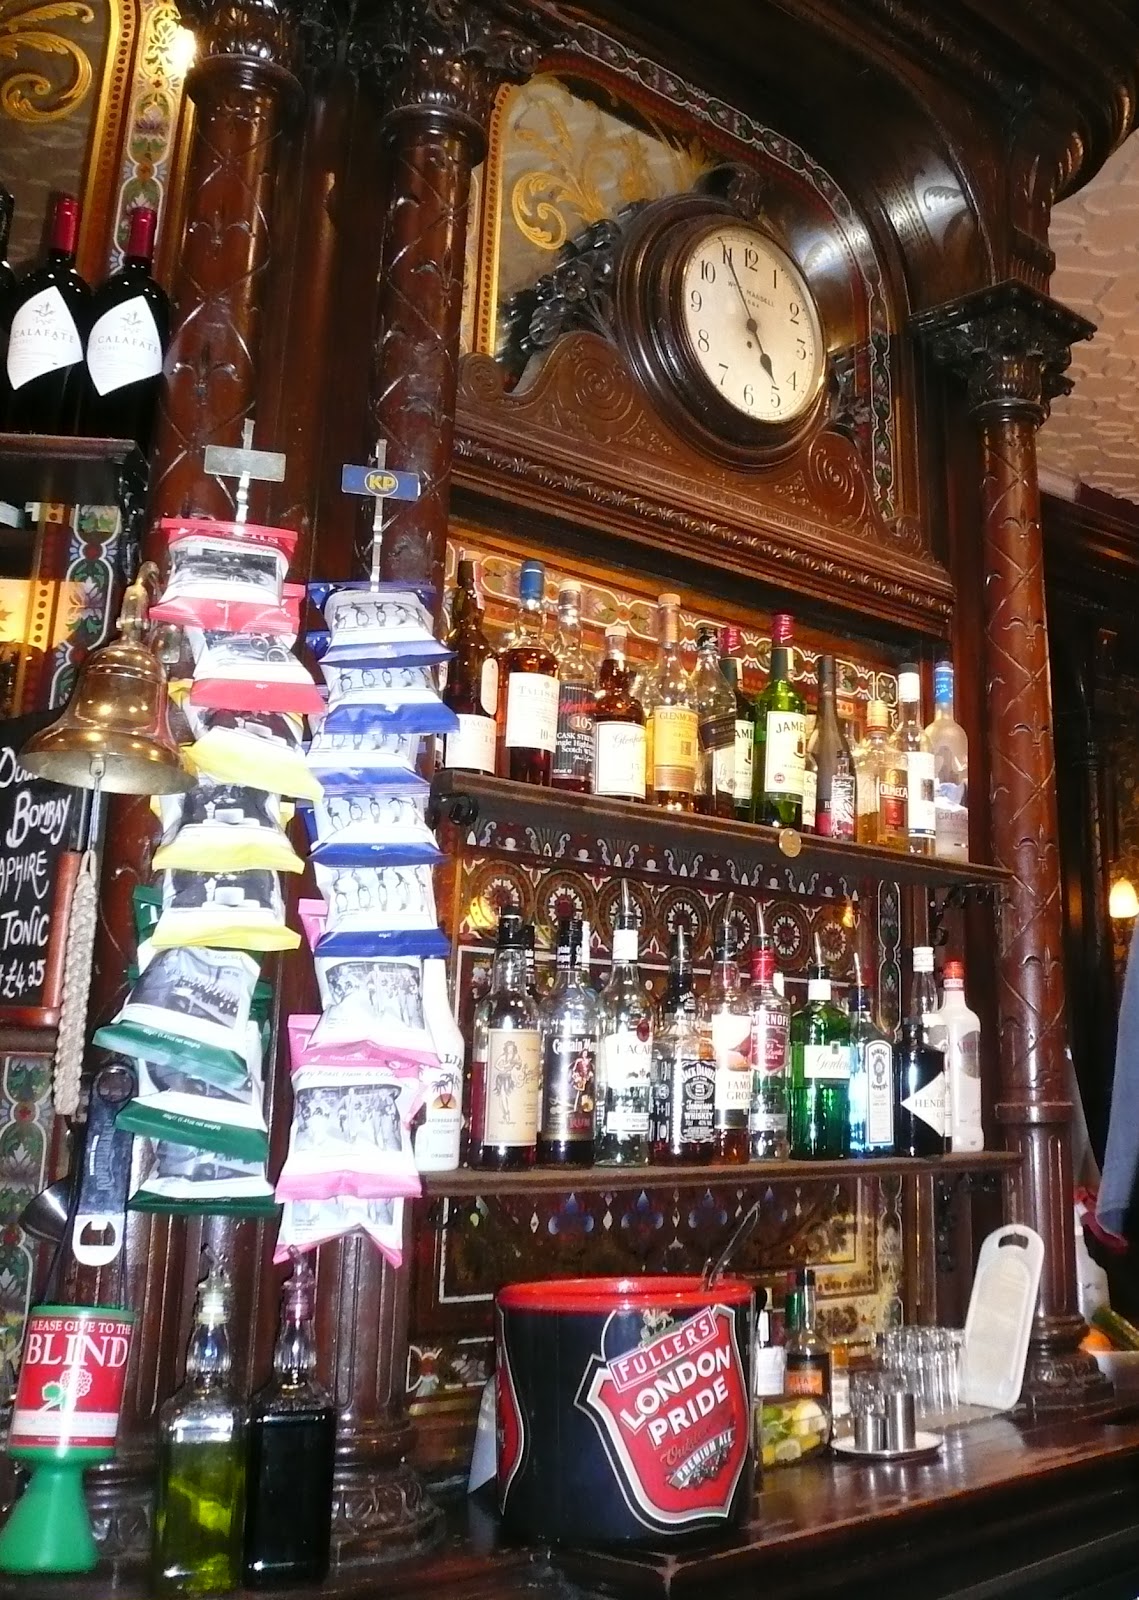
My first stop after arriving in London is always to The Victoria, for a steak and ale pie and a pint. This historic pub is just a 5 minute walk from Paddington Station and is a place where locals flock for their superb atmosphere, fantastic home cooked food and first class beer. Check out the shots below from inside The Victoria.


My first stop after arriving in London is always to The Victoria, for a steak and ale pie and a pint. This historic pub is just a 5 minute walk from Paddington Station and is a place where locals flock for their superb atmosphere, fantastic home cooked food and first class beer. Check out the shots below from inside The Victoria.


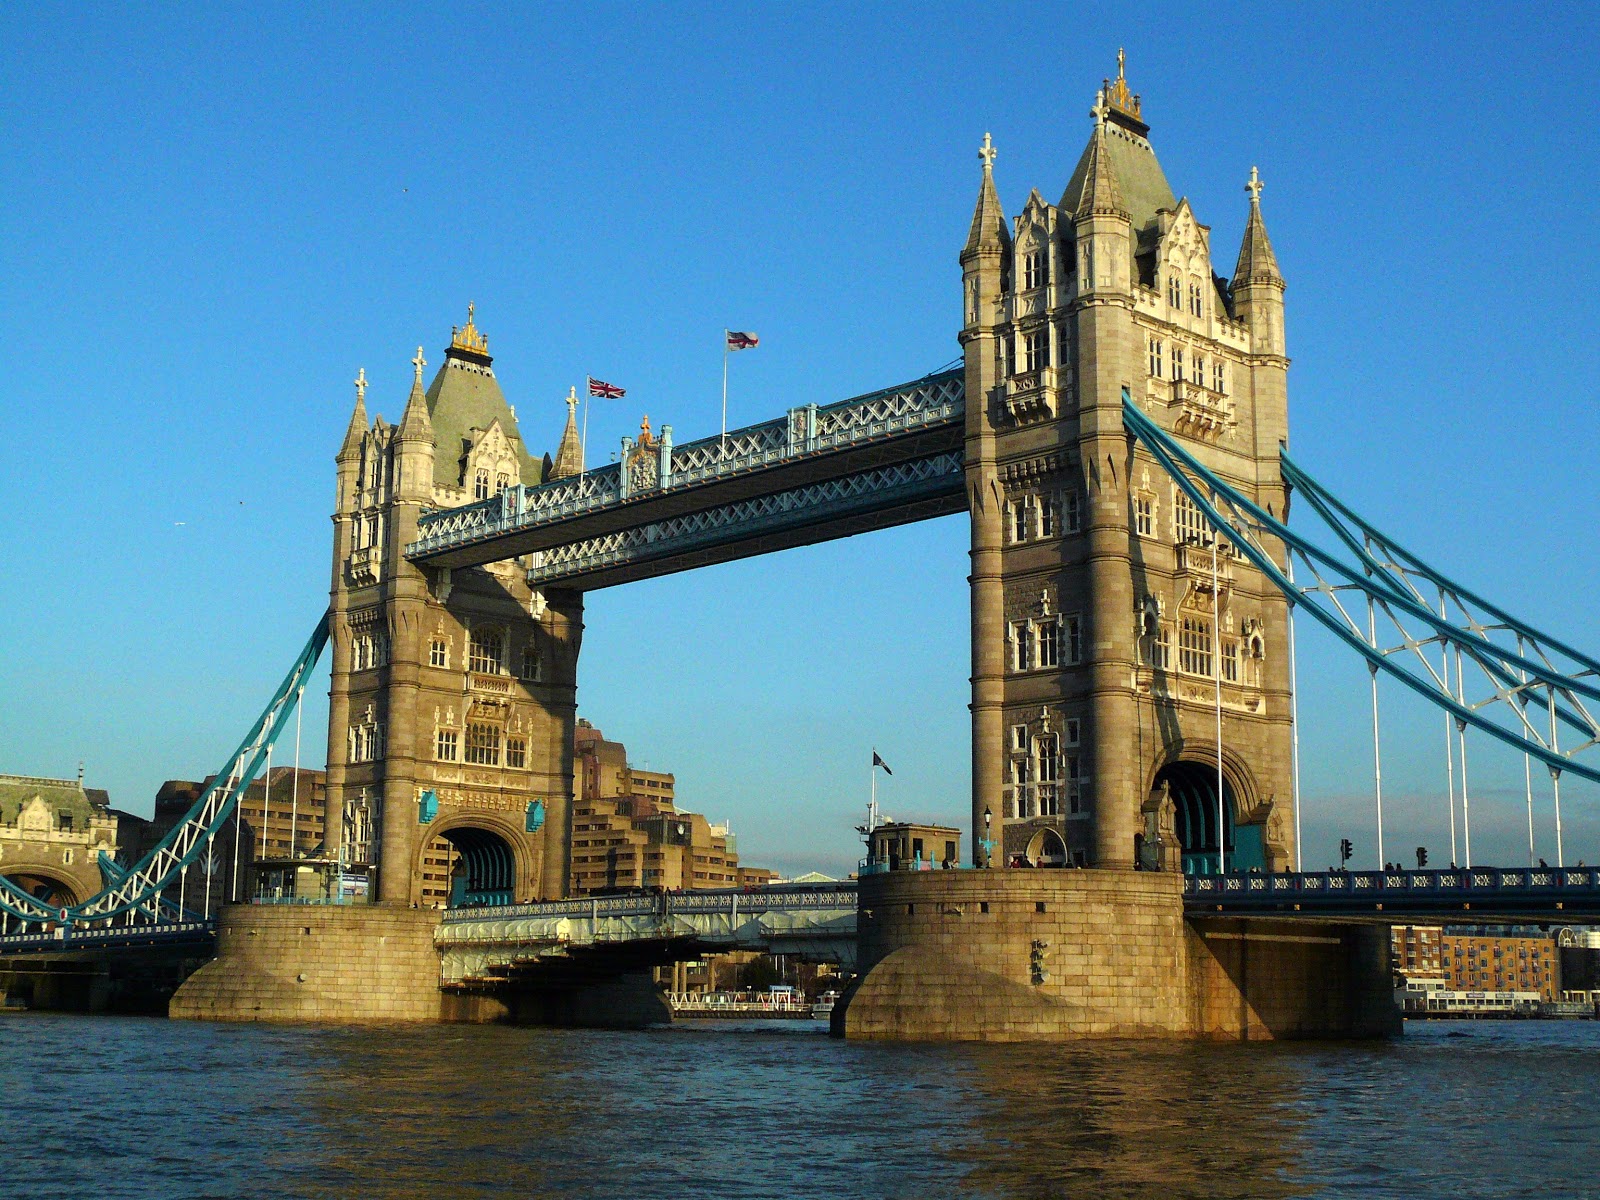
No trip to London is complete without a stroll past some of their iconic landmarks through town. Below are a few of my favorite shots. I have also provided a link under my "fab photos" page with the remaining photos taken during my trip.


Now that I am back in the states, I think it's time for me to try my hand at cooking up some of that fabulous London cuisine right here in good ole' Shallotte. Be on the look-out, my next recipe just might be a savory chicken pie or some home-made fish and chips!
Until next time....
XOXO
Suzanne
Monday, February 13, 2012
Chicken Parmesan

Chicken parm is my "go-to" dish every time we go to an Italian restaurant. So, I decided that today I would try to make my first home made chicken parmigiana. (I always think it sounds fancier to call it "chicken parmigiana!) I searched through tons and tons of recipes on the web and decided that lots of them called for way too many ingredients and way too much time in the kitchen. A note about me- I tend to look for recipes that have the best looking photo with the shortest list of ingredients. Therefore, I decided to take a few recipes, throw them together and make one of my own.
Ingredients:
3 large chicken breasts
extra virgin olive oil
1 small onion, chopped
1 tsp dried basil
1 tsp oregano
1 24 oz jar onion and garlic spaghetti sauce
1 16 oz can diced tomatoes
salt and freshly cracked pepper
1/2 cup all-purpose flour
2 large eggs, beaten
1 tablespoon water
3/4 cup dried Italian bread crumbs
1 (8oz) ball fresh buffalo mozzarella
freshly grated Parmesan
1 pound spaghetti
Directions:
Sauce:
1. Coat a sauce pan with olive oil and place over medium heat.
2. Saute' the chopped onions until translucent.
2. Saute' the chopped onions until translucent.
3. Add diced tomatoes, spaghetti sauce, basil, oregano and salt & pepper to taste.
4. Mix together, cover, reduce heat and simmer for about 20 minutes.
4. Mix together, cover, reduce heat and simmer for about 20 minutes.
Chicken:
1. Butterfly the chicken breasts and pound out using a meat mallet to 1/2" thick.
2. Put the flour in a shallow platter and mix in a fair amount of salt and fresh cracked pepper.
3. In a wide bowl, mix two well beaten eggs with 1 tbs of water.
4. Pour the bread crumbs onto a platter and, using a fork, mix in some freshly grated Parmesan.
5. Dredge the chicken in the flour, dunk in the egg wash, let the excess drip off and then dredge in the bread crumbs to coat.
6. Heat three tablespoons of olive oil in a skillet over medium - high heat. Once the oil is hot, cook the chicken for about 4 minutes on each side, turning once. They should be a nice golden brown.
Now you're ready to put it all together:
Now you're ready to put it all together:
1. Ladle just enough sauce to cover the bottom of a large 13x9 casserole dish. Lay the chicken down over the sauce. Pour the remaining sauce over the chicken.
2. Top with Mozzarella cheese and shred a bit more Parmesan to top it all off.
3. Bake at 450 for 20 minutes, until the cheese is nice and bubbly. Serve over spaghetti.
2. Top with Mozzarella cheese and shred a bit more Parmesan to top it all off.
3. Bake at 450 for 20 minutes, until the cheese is nice and bubbly. Serve over spaghetti.
I know I learn better with pictures.....so please see below!


Subscribe to:
Posts (Atom)